No matter how much automation you have built, no matter how great you are at practicing Infrastructure as Code (IAC), and no matter how successfully you have transitioned from pets to cattle, you sometimes need to interact with your AWS resources at the command line. You might need to check or adjust a configuration file, make a quick fix to a production environment, or even experiment with some new AWS services or features.
Some of our customers feel most at home when working from within a web browser and have yet to set up or customize their own command-line interface (CLI). They tell is that they don’t want to deal with client applications, public keys, AWS credentials, tooling, and so forth. While none of these steps are difficult or overly time-consuming, they do add complexity and friction and we always like to help you to avoid both.
Introducing AWS CloudShell
Today we are launching AWS CloudShell, with the goal of making the process of getting to an AWS-enabled shell prompt simple and secure, with as little friction as possible. Every shell environment that you run with CloudShell has the AWS Command Line Interface (CLI) (v2) installed and configured so you can run aws commands fresh out of the box. The environments also include the Python and Node runtimes, with many more to come in the future.
To get started, I simply click the CloudShell icon in the AWS Management Console:
My shell sets itself up in a matter of seconds and I can issue my first aws command immediately:
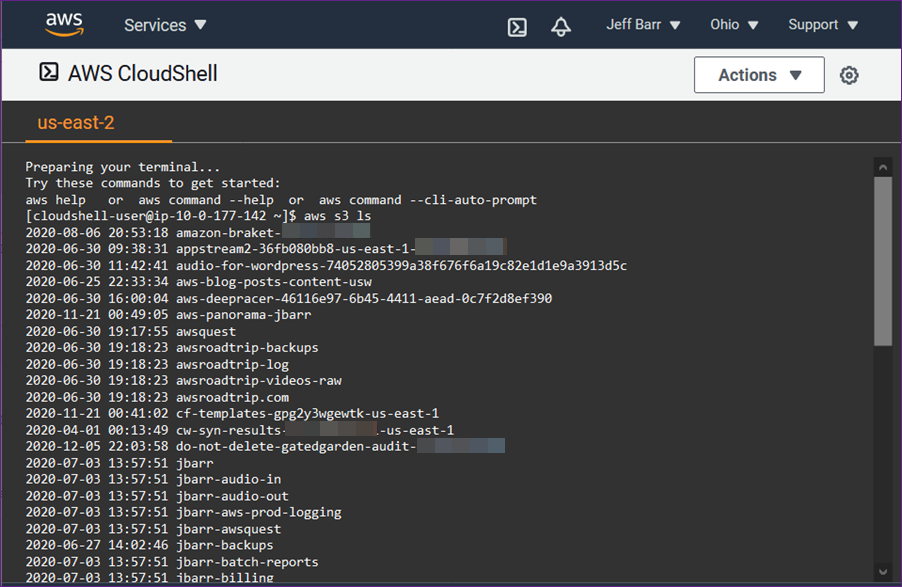
The shell environment is based on Amazon Linux 2. I can store up to 1 GB of files per region in my home directory and they’ll be available each time I open a shell in the region. This includes shell configuration files such as .bashrc and shell history files.
I can access the shell via SSO or as any IAM principal that can login to the AWS Management Console, including federated roles. In order to access CloudShell, the AWSCloudShellFullAccess policy must be in effect. The shell runs as a normal (non-privileged) user, but I can sudo and install packages if necessary.
Here are a couple of features that you should know about:
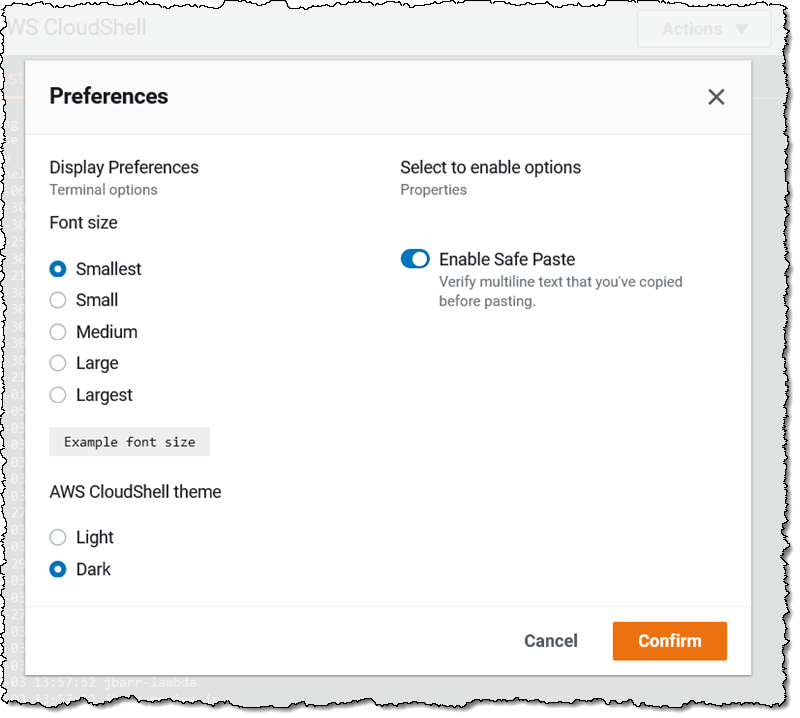
Themes & Font Sizes – You can switch between light and dark color themes, and choose any one of five font sizes:
Tabs and Sessions – You can have multiple sessions open within the same region, and you can control the tabbing behavior, with options to split horizontally and vertically:
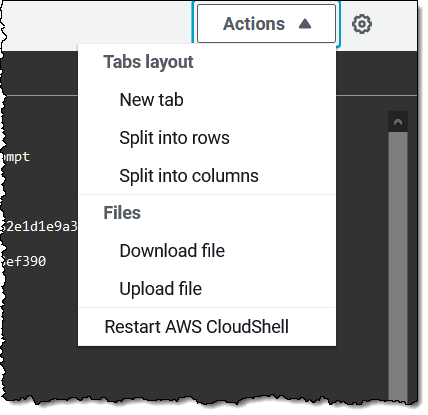
You can also download files from the shell environment to your desktop, and upload them from your desktop to the shell.
Things to Know
Here are a couple of important things to keep in mind when you are evaluating CloudShell:
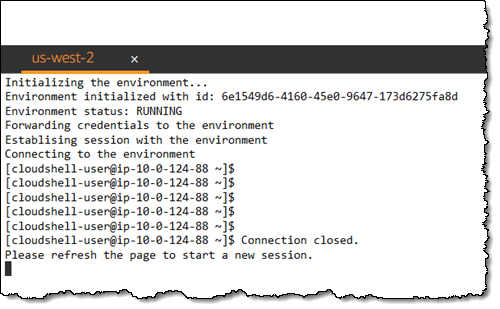
Timeouts & Persistence – Each CloudShell session will timeout after 20 minutes or so of inactivity, and can be reestablished by refreshing the window:
Regions – CloudShell is available today in the US East (N. Virginia), US East (Ohio), US West (Oregon), Europe (Ireland), and Asia Pacific (Tokyo) Regions, with the remaining regions on the near-term roadmap.
Persistent Storage – Files stored within $HOME persist between invocations of CloudShell with a limit of 1 GB per region; all other storage is ephemeral. This means that any software that is installed outside of $HOME will not persist, and that no matter what you change (or break), you can always begin anew with a fresh CloudShell environment.
Network Access – Sessions can make outbound connections to the Internet, but do not allow any type of inbound connections. Sessions cannot currently connect to resources inside of private VPC subnets, but that’s also on the near-term roadmap.
Runtimes – In addition to the Python and Node runtimes, Bash, PowerShell, jq, git, the ECS CLI, the SAM CLI, npm, and pip already installed and ready to use.
Pricing – You can use up to 10 concurrent shells in each region at no charge. You only pay for other AWS resources you use with CloudShell to create and run your applications.
Try it Out
AWS CloudShell is available now and you can start using it today. Launch one and give it a try, and let us know what you think!
— Jeff;


